Come on forward to let the world behind

Welcome to Technology era Great visit here

Showing posts with label tricks. Show all posts

Friday, November 04, 2016

How to Track Your Lost or Stolen Android Phone?


How to Track Your Lost or Stolen Android Phone


Your smartphone is a bit of everything. You have all your photos, important documents and friend’s contact list on it. Losing one or having it stolen is the worst nightmare one shall have. Taking that into perspective, we have narrowed down few steps one should carry in case his/her smartphone gets lost.

How to Track Your Lost or Stolen Android Phone

STEP 1:

First and foremost thing after buying a smartphone is to write down the IMEI number of your phone. Every smartphone has a unique IMEI number (International Mobile Equipment Identity Number). A dual SIM phone will have 2 IMEI number. It will also be printed on the back of your device’s packaging. If you are unable to find the number, you have to launch your phone app and dial the number *#06#. This will give you the IMEI number of your phone. Store this number in a safe place so that it helps you in locating your phone when it is lost. Another way of finding an IMEI number is by logging intogoogle dashboard account.

If your phone gets lost, you can file a Police complaint by filling up this form (download here) and submitting it to the Regional Police Unit Office (Hanuman Dhoka, Teku for Kathmandu Valley users). You have to provide IMEI number of your phone while filing a police complaint and then your service provider (NTC/NCell) uses this IMEI number to track your phone. Also, make sure that you block the SIM card that was being used in the handset. This will force the thief to replace the SIM, which will help us find his/her identity.
How IMEI tracking works?
Your Network provider will blacklist the IMEI number(s) which you provided while filing a complaint and when the thief inserts a new SIM on that phone, the BTS (Tower) will receive the details of the new SIM inserted. From that details of the new SIM, you will know the thief’s name and all the details.

STEP 2:

Track Your Lost or Stolen Android PhoneDownload Google’s Android Device Manager (Link). If you lose your phone, you can just visit www.google.com/android/devicemanager website and locate it with your Google account. Using this, you can find it on a map, ring it, lock it, or remotely erase it. This service will be the best option for most Android users.

 STEP 3:

Turn on Photos sync on Google photos or use DropBox. Syncing your camera photos can be a good idea. A clever idea indeed, if it works. The suspected thief can use your camera and click some selfies or photos and you can view their photos from your google plus account.

STEP 4:

Inform your friends and family of the theft. It’s possible that the thief may try to impersonate you through social media or via SMS.

Tuesday, March 08, 2016

How to Track Your Lost or Stolen Android Phone inside Nepal?

How to Track Your Lost or Stolen Android Phone inside Nepal? 
STEP 1:
First and foremost thing after buying a smartphone is to write down the IMEI number of your phone. Every smartphone has a unique IMEI number (International Mobile Equipment Identity Number). A dual SIM phone will have 2 IMEI number. It will also be printed on the back of your device’s packaging. If you are unable to find the number, you have to launch your phone app and dial the number *#06# . This will give you the IMEI number of your phone. Store this number in a safe place so that it helps you in locating your phone when it is lost. Another way of finding an IMEI number is by logging into google dashboard account.
If your phone gets lost, you can file a Police complaint by visiting the Regional Police Unit Office (Hanuman Dhoka, Teku for Kathmandu Valley users). You have to provide IMEI number of your phone while filing a police complaint and then your service provider (NTC/NCell) uses this IMEI number to track your phone. Also, make sure that you block the SIM card that was being used in the handset. This will force the thief to replace the SIM, which will help us find his/her identity.
How IMEI tracking works?
Your Network provider will blacklist the IMEI number(s) which you provided while filing a complaint and when the thief inserts a new SIM on that phone, the BTS (Tower) will receive the details of the new SIM inserted. From that details of the new SIM, you will know the thief’s name and all the details.
STEP 2:
Download Google’s Android Device Manager (Link ). If you lose your phone, you can just visit www.google.com/android/devicemanager website and locate it with your Google account. Using this, you can find it on a map, ring it, lock it, or remotely erase it. This service will be the best option for most Android users.
STEP 3:
Turn on Photos sync on Google photos or use DropBox. Syncing your camera photos can be a good idea. A clever idea indeed, if it works. The suspected thief can use your camera and click some selfies or photos and you can view their photos from your google plus account.
STEP 4:
Inform your friends and family of the theft. It’s possible that the thief may try to impersonate you through social media or via SMS.

Monday, October 12, 2015

Way to Remove/Recover/Unlock Memory Card Password(Trick)

Way to Remove/Recover/Unlock Memory Card Password(Trick)

how-to-unlock-memory-card-password-easily

Remove/Recover/Unlock the SD Card Password:

Many people try to secure their photos and data of their memory card by keeping a password to it. By keeping the password to the Memory card can secure their whole data safely. But some times they will forget the password of the SD card. So without password we cannot access atleast one file from the Sd memory card. Manually we cannot remove the password. SO today i am going to teach you a tutorial on "How to Remove/Unlock/Recover the Sd card Password".
how-to-unlock-memory-card-password-easily
Here you can see 4 methods to recover the sd card password. So follow the simple steps to unlock the memory card.
Methods To Recover/Remove Micro Sd Card Password From PC:

They are 4 methods to Recover your data from the memory card by unlocking the Sd card. Using these methods you can easily unlock your memory card easily. So follow the step and unlock the SD card successfully.
Let us discuss the methods clearly. With out wasting the time let us go in the tutorial.
If you want to know some more tricks Click On Tricks


1) How to Remove Memory Card Password on PC?

Open the File Manager in the Mobile.Click on System folder in the settings.

Search for the file name "mncstore" there.

Send that file to Pc or Computer or Laptop.
Now Open the file in Notepad.
You will see the Password of the Memory card in the file which you opened.
You can easily implement this trick in any of the Android phone or any device which has a folder "mncstore" in it. With this folder.


2) How to Recover Memory Card Password using Software?
Remove the Memory card from the device first.
Now insert it in another device.
Connect to pc or laptop.
Once done give a right click and select the menu option.(This for Windows Only)
Now you can have a memory with password removed or Unlocked.
Must See:
Backup Your Data From Facebook With A Simple Trick.

3) How to Remove Password from Memory Card?
Remove the sd card and insert in any one of the N-Series of Nokia mobile.
Now format the Card.
That's it!! It don't ask you the Password now.

4) How to Unlock Micro Sd Memory Card Password?
To scan the files in your mobile. You need to Download an explorer to scan the files.
Open the explorer and enter zero[0], Which will help you to see the System files.
Search for a file called "mncstore".
You may find it at the Path: System/Data/mncstore.
There you will be seeing a code in the third column like: TMSD02G
Delete the code in order to unlock the memory card or Reset the Memory card.

Monday, May 18, 2015

Solved memory card problem using cmd

   MEMORY CARD PROBLEM SOLVED
In this post i am going to tell you the tricks to solve memory card problem  by formatting through command prompt.

   1.Open command prompt with administrative right

    2.Type CHKDSK with one space with the memory card drive name

                        e.g  Chkdsk h: /f


[GUIDE] Using chkdsk to fix a corrupted SD card-untitled.png
    3.Press enter this is the way you can recoverd the corrupted and lost directory of memory    card


[GUIDE] Using chkdsk to fix a corrupted SD card-chkdsk.png


Sunday, May 17, 2015

Speed up your slow computer Quicks trick

 Speed up your  slow computer Quicks


Following steps were belows:

                               First Method

1.go to start box type %temp% in search box and press enter.
2.All temp files were then listed select all by pressing Ctrl+A and delete all.

                              Second method 

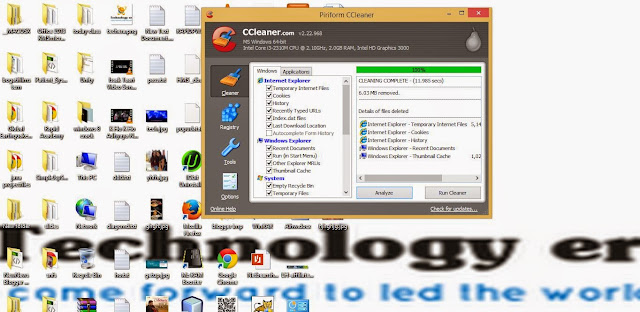
  Download CCleaner and run the  analyzer and optimize belows as steps shown follow it

1.Click on CCleaner

 2.click on ccleaner above registry


3.Click on analyze 


4.Then finally click on Run cleaner option and u are done 


5.Follow same steps first click on registry then analyze click on ok if any option occur then 
Finally Run Cleaner Above.


Finally Download link of CCleaner below.
click on it and see above steps.

CCleaner

Third method

1.Download and use Tuneup utilities
    link below


                                            Fourth Method

1.Download and use advanced care setup
    download link belows:
        
Stay and connected with us by liking our Facebook Page

What to do if your firefox browsers and other browsers stop responding and working check it?


Idea to solve  not responding browsers problem

Look at the steps below,recently i also got the same problem then i tried the below steps then i got to know the ideas which i amgoing to share on this post.

step1.from start menu all program then accessiories /

step2.Enter in to command prompt with administrator right.

step3.check the steps in cmd

    I.ipconfig /flushdns
     
    II.nbstat -R
     
    III.nbtstat -RR
    
    IV.netsh int reset resetlog.txt
     
    V.netsh int ip reset
     
    VI.netsh winsock reset

Finally type exit and Reboot your computer

your problem wiill be solved.
Share and like this if any problem comment below.

Tuesday, October 14, 2014

Tricks to capture WIFI password from android phones

WPSPIN is a useful tool and software to crack the pin no of router and also can acquire the WIFI password of WPS encryption.
Check step belows.
1.Download WPSPIN apps from google then install on ur android phone.
2.open the apps and just long press on the any wifi open networks.
3.you will be notify with 3 differents pin number,just open ur laptops and try to paste the same pin number that u got from the apps.
4.finally if the router is crack you will be connected to the networks,after try to check the password from network and setting.
5.Enjoy free wifi both from laptops and android phones.

Thursday, June 20, 2013

1.Top steps for removing or identifiying virus without using antivirus

1.Top steps for removing or identifiying virus

  Monitoring your PC through your task manager is a basic step you can do if you want to know whether your computer running suspicious program, but it is not 100% you can identify your problem. The best way is having an AV even it is free such as avast for home users.
 Common viruses such as 'Ravmon' , 'New Folder.exe', 'Orkut is banned' are spreading through USB drive .
Most anti virus programs are unable to detect them and even if they do, in most cases they are unable
to delete the file, only quarantine it.So in our post we use command prompt to remove harmful files that
any anti-virus can't.


These are the steps.
desktop.png

Step 1:

 Run the command prompt by going to start and type cmd on the search programs and files.

Step 2:

drive.png
Select the virus affected drive
  (drivename: )
examples
C:
J:
F:
D:
E:


Step 3:

 type attrib -s -h *.* /s /d then press enter

Step 4:

dir.png
* type dir 
  the dir command shows you the content of the drive
STEP 5:
check if there is an unusual .exe file
          if there's an autorun.inf file rename it
rename filename.extension newfilename )


rename.png


Step 6:Check it out


Step 7:select the drive


Step 8.Delete the harmful files


 *you can also delete the harmful files using command prompt
     ( type del filename)
hope u like the tutorial share this if  i got true  and comment...

   share 

Wednesday, April 17, 2013

How to Lock folder on windows using recycle bin

How to Lock folder on windows using recycle bin

Hello friends, here i am going to share tip which will help you to lock folder for protecting your important data as well as data that required to lock for preventing access. there are lots of utilities available that will help you to achieve this, but all are some how trial version or limited version.

So, if you want to lock folder on your pc please follow below steps. note that these changes are under windows registry so, avoid to implement if you are not well enough technically known person :)

here are the way you can lock any folder using recycle bin :

open Run in your computer or press (ctrl +R) and type ‘regedit‘ command
You can list of keys and relates values.navigate through list until you find CLSID no of recycle bin in registry editor

For example:

CLSID no of recycle bin is >> {645FF040-5081-101B-9F08-00AA002F954E}

Now its time to lock folder using recycle bin so, lets say you want to lock folder named ‘Folder1?

so inside notepad editor type following text like

ren folder1 recycle.{645FF040-5081-101B-9F08-00AA002F954E}

and save that files as lock.bat

To unlock related Lock folder , you can create another batch file which will unlock folder.Type below line in another notepad file and save that as ‘unlock.bat’

ren recycle.{645FF040-5081-101B-9F08-00AA002F954E}

So, when ever you want to lock folder execute created lock.bat and reverse execute unlock.bat for locking folder

Tuesday, April 09, 2013

How to recover deleted file without using any software


How to recover deleted file without using any software

-----------------------------------------------------------------
Recover your deleted files without using any 3rd party software. I'm not talking about restoring files from recycle bin.
This simple trick mostly works on Vista versions and all the Windows 7 versions
So let's see how to recover deleted file without using any software 
For example lets assume that you have permanently deleted "My Sweet Heart.JPG" from the folder named "My LIFE" ;) , and now you want to recover "My Sweet Heart.JPG" back.
Do this simple trick to recover your Sweet Heart.JPG
Right Click on the particular folder
Select "Restore previous versions"
That's all, now you will see a option to recover the particular file.

If you don't see "Restore previous Versions" by Right Clicking, Go to
Control Panel -->
System and Secutiry -->
System -->
Click on System Protection (in left sidebar) -->
Select the particular drive and Click Configure -->
Then select "Restore system setting and previous versions of files" -->
Now Click on OK

Note :
Previous versions come from restore points or from windows backup.
This trick will not work at all the time.

                                 connect us on our facebook page::https://www.facebook.com/ComputersApplicationAndHackingTips?ref=ts&fref=ts

Tuesday, April 02, 2013

How to protect your wifi full article

WIFI protection

 In this article we are going to cover how to protect your Wi-fi being stolen and detect the thief. 
It covers Wi-Fi set up, Router configuration, Network Key set up and how to get all computers in your Wi-Fi network.
It is really important to protect Wi-Fi, the problem would be in a case where your neighbor is connecting to you WI-Fi and doing suspicious activities. You will never know what is he doing and how. But yes if the suspicious activity been caught by cyber-crime, you will be the culprit because everything was banging from your Wi-Fi and it will reflect your identity. Beware! This is really serious.
It could be a daunting task for less tech savy. I will guide you through few simple steps to protect Wi-Fi
You don’t have to perform this If you have already set up a network key during router configuration.
  • Read router manual carefully and try to configure security settings
  • Keep your network key difficult to guess for anyone but easier for you (this has been covered in previous post)
  • 99 percent of the people who could hack your Wi-Fi will be discouraged by the strong network key
  • Verify if your router configuration authentication has been changed, all routers come with default username and blank or admin password. Change it at the first place though it asks during the first time installation as well.
  • Go to Start and Control Panel
Start-Control Panel
Start-Control Panel
  • Select Network and Internet then click on Change adapter settings
netork connection
network connection
  • Right click on Wireless Network Connections and select status
Network Connection Properties
  • On the status window, click on wireless properties
Wireless Newtork Connection Status
Wireless Network Connection Status
Click on Security tab, your security type should be WPA2 which is the most advanced mechanism. Encryption type as AES. Enter your network security key and apply settings.
Wireless Network Connection Security
  • Turn ON MAC address, in the preivious post it has been shown how to setup IP. In the same page there is an option to copy/apply your machine MAC. Enabling MAC will allow only your machine to connect to Wi-Fi
Please follow these simple steps and I and you will be definitely safe from intruder. Don’t forget you are safe in your Wi-Fi and you have to take care in open WI-Fi while connecting your smart phone, laptop or tablet. 

Monday, April 01, 2013

How to Recover Hidden Files From Virus Infected USB Pendrive without any Software

How to Recover Hidden Files From Virus Infected USB Pendrive without any Software
We are using USB pen drives for data transfer between computers. It's very important to keep your data always with you. When you're using pen drives, the biggest problem is Viruses. Mostly pen drives doesn't consist any security measures. So viruses and malwares can attack our pen drive easily. If virus attacks your pen drive, it hides the all the files and creates .exe extension to replace the hidden files.

Normally you can view hidden files by clicking
Folder Options -->
View -->
Show Hidden Files and Folders
But this simple method doesn't work when your pen drive is attacked by harmful viruses.

So here I'll provide you an easiest method to view your infected files from pen drive without using any software.

Insert pen drive into computer and find drive letter of connected USB drive
For Example, E:

Now click on Start --> Run

In Run box, type cmd and hit Enter

Now command prompt will appear, in command prompt type the drive letter of your pen drive and hit Enter.
Example type E:

After that, type attrib -s -h /s /d *.*

Now hit Enter and wait for sometime. That's all, you have done !!! Now you can view all your files in pen drive without any problems.

Wednesday, March 13, 2013

essential gmail tricks

Essential Gmail New Tricks :::
:
:
Here I am going to give you the essential new web trick for your Gmail account. If you just fed up from the lots of advertisement on your Gmail account and want to remove ads in Gmail account then follow the new web trick given below: 

Step1:

By default, Google's webmail displays advertisements. Sometime, you are not able to read your personal e-mails when an advertisement Popup in front of your mail. So I have a new trick to solve this problem.
You can remove them by going to the>>” Settings tab” then extracts the web. There, you have to uncheck or unmarked the” Show my web clips above the Inbox”.

Step2:

Some time when you are sending a mail and certainly ,you want to cancel it but it is not possible for you to cancel it. Now I will give you a web trick to cancel the email quickly when you are sending it.
You simply activate the Cancel sending in the Labs of Gmail. So you'll have a few seconds after sending your e-mail to cancel the shipment, a few seconds but no more.

Step3:

Save time by activating the keyboard shortcuts in Gmail. Once you discover keyboard shortcuts, you can simply do without it.
You can activate the tab General of settings, but also enable the customization of keyboard shortcuts in Labs. Once this option enabled, you can customize the tab for keyboard shortcuts in your freshly emerged settings.

Step 4:

Manage your tasks in Gmail. It has been slow to arrive but its inclusion is rather satisfactory. Write down your tasks in this small area, turn emails into tasks, sort them by priority ... learn how to manage its tasks in Gmail.

Step5:

Quickly find recent conversations with your contacts. Rather than go get lost in the intricacies of your conversation tool right inside Gmail, this is a very quick way to view these digital exchanges. Simply however the name of a contact from an email sent or received. In the tooltip that appears, click the option more.

https://www.facebook.com/ComputersApplicationAndHackingTips?ref=tn_tnmn

Download pdf file about ddos attack

http://www.anyfileshere.com/ddos-attack.htmlclick on above link and download pdf file about dos attack
join us https://www.facebook.com/ComputersApplicationAndHackingTips

Sunday, March 10, 2013

way of tracing Emails IP Address

Trace Emails
----------------

So here is the method of tracing the
exact location from the
email sent.I am showing the email
tracing on yahoo here but
gmail and other mail providing
services have same concept.
Step 1:-First open up your email
account and click on your
... inbox.
Step 2:-Now Select any email that
you want to trace
Step 3:-After Opening scrool the
mail at the end and in right
corner you will see a option FULL
HEADER click on it
Have a close eye on these contents
Step4. : This is how it will look like :
[Received From: - 127.0.0.1(EHLO
mail-qy-f200.google.com)
(209.85.221.200) ] <-------the br="" ip=""> address at last is the real IP address
of
the person who is sending this mail.
These
websites help you to find the whole
detail and satellite images of
the ISP location from the Email was

Tuesday, February 12, 2013

how to create password protected Folders without software.


Hello everyone, Today we will see how to create password protected Folders without software.
Securing personal files/softwares cannot be guaranteed in a situation whereby more than one person is permitted to a make use of a computer.

In this case,it is very necessary to ensure all sensitive/personal documents are kept hidden from the view of such users.
But how can you do that without a software?

Well,here's an easy way to it.
So,if you think there's a file/folder you'd like to keep hidden from the reach of others,just follow the steps below.


How To Secure Files/Folders Without Software

Create a new folder and create a new ‘Text Document’ in it by right-clicking and selecting ‘New’ » ‘Text document’.
Copy - Paste the following code snippet in the text document


cls @ECHO OFF title Folder Private if EXIST "Control Panel.{21EC2020-3AEA-1069-A2DD-08002B30309D}" goto UNLOCK if NOT EXIST Private goto MDLOCKER :CONFIRM echo Are you sure you want tolock the folder(Y/N) set/p "cho=>" if %cho%==Y goto LOCK if %cho%==y goto LOCK if %cho%==n goto END if %cho%==N goto END echo Invalid choice. goto CONFIRM :LOCK ren Private "Control Panel.{21EC2020-3AEA-1069-A2DD-08002B30309D}" attrib +h +s "Control Panel.{21EC2020-3AEA-1069-A2DD-08002B30309D}" echo Folder locked goto End :UNLOCK echo Enter password to unlockfolder set/p "pass=>" if NOT %pass%== password here goto FAIL attrib -h -s "Control Panel.{21EC2020-3AEA-1069-A2DD-08002B30309D}" ren "Control Panel.{21EC2020-3AEA-1069-A2DD-08002B30309D}" Private echo Folder Unlocked successfully goto End :FAIL echo Invalid password goto end :MDLOCKER md Private echo Private created successfully goto End :End


Locate `Password here` in the code above and change it to whatever password you want to use (Simple to remember,but hard for others to guess)


Now click on File » Save as and give it any name you so desire but with a .bat extension.
E.g : Lock.bat


Now,exit notepad and on getting to the new folder you created previously, you'll see a "LOCKER" command.


Double-click on this file and a new folder will appear (Private OR Confidential)
Now,copy/move all you want to hide in this “Private/Confidential” folder and go back one step.
Double-click on the "LOCKER" command again and you'll be greeted with something new.
Just press 'Y' as instructed and hit enter.


Immediately,the ‘PRIVATE / CONFIDENTIAL’ folder will disappear.Now,all your files & documents are secured in this hidden folder.


To undo hiding,double-click on this “Locker” command again and input the password you used above. Hit Enter and the hidden folder will re-appear..Now,that's it.

NOTE ↓:
These files can still be sometimes accessed using the search,so it is highly recommended you rename your files before hiding them so as to ensure its maximum security.


If you think this article is usefull to you plz share it,tweet about it, click g+1

Thank you :)

Sunday, February 10, 2013

how to get ur profile pic in facebook chat


  • First go to your Facebook profile page
  • Click on the profile picture on upper left corner
  • Look at the web-browers address bar.
For Example :-http://www.facebook.com/photo.php?fbid=176220644=a.119774000614.23997.171644843&type=1&theater

  • Now get the part between ‘.’ and ‘&’ . In above example it is 171644843
  • Now go to your facebook chat and type [[171644843]] and press Enter.
  • You'll have your own facebook icon in the facebook chat box.
Also Check Out Various Wide Range of Emoticons Which you can Use in the Chat Boxhttp://www.techzclub.com/2012/07/all-facebook-emoticons.html

Tuesday, February 05, 2013

What is Poke on Facebook?

What is Poke on Facebook?

Some people have wrong understanding
that poke at Facebook is symbol of
disturbing.
Following are the correct
meanings of Poking at Facebook.

1.A “poke” is basically someone trying to
get your attention It’s one of the
meaningless features that are used just to
annoy someone.

2.If you poke someone not in your network
and they poke back. You can view their
profile even if your not their friend!

3.A poke is when you allow someone to
see your Facebook profile for 3 days, so they
can know who you are and hopefully add
you as a friend.
.
.
Share it so that, when you poke your
friend, he know the real meaning ....

HOW TO FIX COMPUTER SLOWDOWNS AND HANGS

HOW TO FIX COMPUTER
SLOWDOWNS AND HANGS
There are many reasons for
slowdowns and hangs of your
computer. For this you have to try
out several solutions and the actual
cause to it. There are some basic
steps that you should perform in
case of slowdowns and hangs.
Moreover you don't require any
external software.
Step 1. Free up memory on your
hard drive if your computer is
performing slower than usual. A
hard drive that is near capacity can
cause the computer to significantly
slow down. Delete any files you no
longer use. You also can use the
"Disk Cleanup" utility built into your
computer. To launch this utility,
click "Start," "All Programs,"
"Accessories," "System Tools," and
"Disk Cleanup." A list of files is
presented in a dialog box. Click the
check box next the files you want to
delete and then click the "OK"
button at the bottom of the dialog
box to activate the utility.
Step 2. Observe your computer and
pinpoint a program or combination
of programs that are running when
it freezes. There might be a specific
program responsible for freezing or
crashing your computer. Try
terminating that specific program
and seeing if that fixes the problem.
To terminate a program, click
"CTRL," "ALT," and "DEL" on your
keyboard. This shortcut opens a
window listing the currently running
programs on your computer.
Choose a program and click the
"End Process" button to terminate
the program.
Step 3. Defragment your computer's
files. Fragmented files occur when
parts of a single file are stored in
multiple places on the hard drive.
This causes a computer to perform
slowly because the computer must
search in multiple places when
accessing a fragmented file. To
defragment your computer, click
"Start," "All Programs,"
"Accessories," "System Tools," and
"Disk Defragmenter."
Step 4. Scan your computer for
malicious files. Viruses or spyware
often cause your computer to slow
down or freeze. Use the virus
scanner that is installed on your
computer. If you don't have a virus
scanner installed on your computer,
there are online virus scanners
available. After you have completed
a virus scan, your results are
displayed. The most desirable option
is to delete any viruses or spyware
that was found on your computer.
Follow the virus scanner's prompts
to delete the virus. However, not all
viruses can simply be deleted. In
this case, choose the "Quarantine"
option in the virus scanner. This
places the file in a separate folder
or location on the drive where it
can't affect other files
Step 5. Repair any disk errors. Disk
errors can cause your computer to
slow down and freeze. You can use a
utility on your computer to detect
and fix disk errors. To do this, first
open "My Computer." Right-click on
the hard drive you want to repair
and click "Properties." Click the
"Tools" tab and then click the
"Check Now" button. Select the
check box next to "Scan for and
attempt recovery of bad sectors."
Then click the "Start" button and
the utility detects and repairs bad
sectors.
Step 6. Reboot your computer if
your computer freezes. Hold down
the "Power" button on the
computer for at least five seconds.
Wait for the computer to shut down
and restart the computer. This is
usually a temporary fix, but will at
least unfreeze your computer
Additional Precautions :
Back up the data on your computer
if your computer is slow or freezing
often. To back up data, plug in an
external hard drive or insert a CD
or DVD and copy important files
onto the storage device. You can
simply drag the files from your
computer into the storage device's
folder. You also can use the
Windows backup and restore utility.
Open the backup and restore utility
in Windows from the "Control
Panel" and follow the prompts to
create an entire clone of your hard
drive.
Try not to reboot your computer by
holding down the "Power" button
too often as this can destabilize the

operating system

How to create new Partition without Formatting a Hard Disk?

  • How to create new Partition
    without Formatting a Hard Disk?

    If your Hard-disk contain 3
    partitionsin your PC and you
    need to create 1 more partition
    then what will you do? Most of
    people are doing the following
    methods to create new partition
    in Hard-disk.
    Format the Hard-disk and create
    a new partition. Let’s see an
    easier method to create a new
    partition without formatting a
    Hard-disk.
    To do this we don’t need any
    software and also no need to
    copy the data to separate drives.
    By doing the following methods
    we can create a New Partition
    from System Drive.
    Right Click on My Computer
    Click Manage
    Now “ Computer Management”
    window will appear.
    In that window Click Storage
    Then select Disk Management.
    In that window Hard-disk and
    other Storage Media detail will
    be shown.
    Now select a Disk drive to create
    a New Partition.
    Right Click on particular Drive
    then Click Shrink Volume.
    Now windows will show the free
    space in particular partition.
    Type the disk size to create New
    Partition in Shrink Window.
    Now click on “Shrink” , within
    few seconds a New Disk will be
    created.
    Still Accessible is not done in
    New Disk.
    Now Right Click on Unallocated
    Drive . Select New Simple
    Volume.
    Click on Next. Now give a size to
    the New Partition. (you can
    choice wholesize right now)
    Select a Drive letter and Click on
    Next.
    Then select Format Setting ->
    File System ->
    NTFS. And keep others as
    default. (if you need you can
    change this)
    Put a tick on “Performances a
    Quick Format” and Click on
    Next.
    Now the New Partition is created
  • successfully.